Showing posts with label tips. Show all posts

Thursday, November 19, 2015

Healthy Foods Nigerian Mothers Can Make For Babies


The Nigerian baby food sector is seeing significant growth as new businesses try to cater for time-poor parents who are looking for convenient but nutritious baby food.

We have come across a number of companies in Nigeria selling pureed baby foods made in pouches. This innovation simply compliments the huge number of imported baby food that can be found in local markets and supermarkets.

While convenience food definately makes sense for busy parents, there is hard evidence to back up the argument that homemade baby food is better than shop-bought.


A recent study by Glasgow University’s department of human nutrition found that babies had to eat twice as much processed food as homemade food in order to get the same nutrients.

At around six months, when starting on solids, many parents lead their children down another wrong path – that of powdered cereals, premade baby foods, and junk foods disguised as baby-friendly snacks.

One recommendation: make your own baby food. I’m sure some readers will comment that cooking for baby is too much work. But it’s worth it.

When weaning, parents should to introduce a wide range of foods to a baby’s diet to reduce the risk of food intolerances.

The following are ingredients that can easily be sourced, that Nigerian parents can use to make baby foods;

Vegetables and tubers: Well-mashed vegetables are a great start. You can use the normal vegetables and tubers you cook for the family, like yam, sweet potato, irish potato, carrots, cauliflower etc.

Fruit: Mashed banana is usually a favourite but avoid fruit with seeds.

Pulses: Pulses include beans, lentils etc. Make sure they are well mashed or puréed and use little flavouring or salt.

Grains: Rice is one of the most popular weaning foods. Just make sure it is soft. You can leave other grains like oats or corn until a few months later.

Swallows: Amala with ewedu is a popular weaning food for babies. Most parents would advice you to add ground crayfish to make a nutritious meal for a growing infant. You can gradually introduce other swallows like eba, semovita, pounded yam as your baby grows older. But ensure that the food is soft enough for your child to consume.

Poultry, meat, fish: Introduce a little of these from about seven or eight months, once your baby is used to the vegetable mixes.

Source by: http://www.mamalette.com/featured/healthy-foods-nigerian-mothers-can-make-babies/

Thursday, November 5, 2015

POTATO SOUP

BY MRS. CHOCOLATE

The weather is cooling down and nothing warms me up like a nice bowl of soup. This weekend I was in the mood for a hearty warming bowl, and decided to make potato soup adapted from this recipe from Gimme Some Oven. I love thick creamy chowders and potatoes; add in some bacon and what’s not to love!

Ingredients:

5 slices diced bacon
3 tablespoons bacon grease (reserved) or butter
1/4 cup all-purpose flour
2 cups chicken stock
2 cups warmed milk
1.5 pounds diced potatoes
1 cup shredded sharp cheddar cheese
1 teaspoon Kosher salt
1/2 teaspoon freshly-cracked black pepper
optional toppings: thinly-sliced green onions or chives, shredded cheese, bacon, sour cream


Directions:
Cook the bacon. I cooked it in the oven, 15 minutes on 400 degrees, but you can also cook it in the stockpot you’re using for the soup. Set aside. Next make the roux by starting off with the bacon grease (or butter) and flour and then mixing in the chicken stock and milk. Once it’s well mixed, add the potatoes and bacon and let it simmer 10-15 minutes until the potatoes are soft. I always add a little extra flour to my roux as I like my soups and cream sauces to be thicker. After the potatoes are tender add in the cheddar cheese and seasonings. The recipe calls for sour cream or greek yogurt here, but it’s a little too tangy for me so I omit it. I think celery and mushrooms would also add some great flavor, but you can really add anything you like. When it’s done, garnish as you like. Enjoy!


Source by: http://www.hellobee.com/2015/11/05/potato-soup/#more-128874

Wednesday, October 28, 2015

Ten breastfeeding tips


Breastfeeding is a gift for your baby that keeps on giving, so enjoy the time together and seek help if you are having difficulties. There is plenty of support out there for new Mums.

1. Eat a healthy, balanced diet while breastfeeding to ensure you get plenty of iron, protein and calcium.

2. Try to feed frequently, as this will help you to maintain your milk supply.

3. At each feed, offer both breasts, but wait until your baby seems finished with one before changing over. Signs may be your baby coming of the breast or seeming unsettled. Your breast will feel quite soft when it is emptier. Offering one breast first ensures that your baby gets the nourishing milk that is delivered later in the feed.

4. If your breasts start to feel uncomfortably full try to encourage your baby to feed with gentle techniques like unwrapping them and placing them on your bare chest where they will smell your milk. Stroking their cheek with your nipple may also rouse their interest in feeding. If you are unable to feed your baby then it is important that you don't stay overly full. Hand express enough for comfort if you will be able to feed shortly, or a good full express if you will be away some time. This regular emptying will ensure a good milk supply and your baby can still have your milk in your absence.

5. You can keep expressed milk in a sealed container in the back of the fridge (not the door) for up to 3-5 days. Alternatively, expressed breast milk can be kept safely in the freezer for up to 6 months. Find out more about breast milk storage times and information.

6. If your breasts are leaking, try using breast pads to absorb leaking milk. Change pads frequently to avoid the nipple becoming too soggy and prone to infection. Use waterproof breastpads only infrequently. An unwanted let-down can be stopped by crossing your arms and using your hands to place pressure directly on the nipple.

7. If your nipples are sore, dry and/or cracked,  the positioning and latch of the baby may need correcting. If it doesn't feel right, if its painful, then the latch is not correct. Ask for help from a lactation consultant.

8. Find a comfortable position to feed in whilst lying down, as this will give you a chance to have a break. It is important you take all the time you need and are not rushed. Breastfeeding is a gift for your baby that keeps on giving, so enjoy the time together and seek help if you are having difficulties. There is plenty of support out there for new Mums.

9. Ask for your partner's support - ask for them to bring you some water and a snack whenever you are feeding.

10. Get a good chair or breastfeeding pillow and create a feeding area, with some magazines or books so you can relax while you feed.


Source by: http://www.essentialbaby.com.au/baby/breastfeeding/ten-breastfeeding-tips-20081030-5bvk.html

Sunday, October 25, 2015

Why you should make your baby’s food (and how)


As a parent of three kids ages preschool to teen, I look back and realize just how important — and, frankly, how simple — feeding my kids was when they were babies and toddlers. I had so much more control back then. I was in charge of all of their meals, of every fragment of food that entered their world. They were too small to sidle up to a school snack bar, be influenced by their best friends; indeed, they hardly ever ate a meal that I didn’t prepare.

It has been shown that children tend to form long-term likings for certain foods and flavors based on their earliest years of eating, and infants tend to be more amenable to trying new foods than their scarcely senior toddler and preschool siblings. These are all good reasons we should feed our babies fresh, delicious, real food from the moment they first seize a spoon.

Homemade baby food is generally more nutritious and tastier than commercially processed food if it is fresh and made from whole foods and nothing else. When cooked in bulk, it is cheaper than commercial options. And you can control the quality of ingredients when you make your own. Seems like homemade baby food is a no-brainer.

Oh wait, it takes time! This is true, but just like any meal, some homemade baby food is better than none. So try making a little bit and see how it goes. In fact, mashed fresh avocado or banana would make a perfect first food, with no cooking required.

How will you know whether your baby is ready for solid foods? According to the American Academy of Pediatrics, she may be ready if she shows interest in the solid food around her, can sit up with support, is able to turn her head to refuse food and has doubled her birth weight (usually at about 4 to 6 months). Always consult your pediatrician, as babies grow at different rates.

How to make your own

Vegetables and fruits


●Steam vegetables or fruits. (Chop larger foods into one-inch pieces.)

●Puree in a food processor or blender. A fancy baby food maker is not necessary; any variety of food processor or blender will do the job.

●Add water to achieve desired consistency for baby’s age and stage.

●If making in bulk, freeze individual servings in ice cube trays, covered with wax paper and then aluminum foil, or freezer wrap (up to three months).

Whole grains


●Grind ¼ cup brown rice, millet or oatmeal in a blender for 1 minute.

●Boil 1 cup of water.

●Reduce heat to low and add grain.

●Cover and let simmer for 10 minutes, stirring occasionally.

●Serve, refrigerate (two to three days) or freeze (up to one month) in ice cube trays.

Meats


●Grind cooked chicken, fish or meat in a food processor or blender and refrigerate (one to two days). Babies should be 7-8 months before eating most poultry, meat and fish.

●Serve alone or mix with pureed vegetables or cooked grains.

Homemade stock

●Homemade stock is full of vitamins and minerals. It aids digestion and builds bones.

●Mix homemade chicken or vegetable stock into baby’s cereal or vegetables to liquefy and add nutrition.

●Babies can drink homemade vegetable stock from a bottle after the age of 9 months.


Source by:https://www.washingtonpost.com/lifestyle/wellness/why-you-should-make-your-babys-food-and-how/2015/10/19/6489a0ba-71f9-11e5-9cbb-790369643cf9_story.html

Wednesday, October 21, 2015

Feeding Baby Pumpkin Baby Food – Pumpkin Baby Food Recipes for Baby


Pumpkin in Baby Food Recipes – When Can Baby Have Pumpkin; Age for Introducing Pumpkin: 6-8 month

What’s Covered:

When can baby eat pumpkin?
How do I choose a pumpkin for baby?
How do I cook pumpkin for baby?
Pumpkin baby food recipes


Did you know that Pumpkins are actually fruits. Many of us think of pumpkin as a fruit so it’s also included it in the Fruits pages. Of course, there are also many people who think of pumpkin as a veggie. How do you think of pumpkin? A pumpkin is a type of squash and is a member of the gourd family (Cucurbitacae). This family also includes squash, cucumbers, gherkins, and melons.

Pumpkins are jam-packed full of some of the best nutritional compounds around. They are highly loaded with Vitamin A and beta carotene. Beta Carotene is one of the plant carotenoids that when eaten and digested, turns into Vitamin A in the human body. Beta Carotene may reduce the risk of cancer as well as heart disease. It also may be responsible for combating or putting off the degenerative effects of aging.

Pumpkins are also good sources of potassium, protein, and iron. Pumpkin seeds also contain a good amount of protein and iron so eating the seeds does provide some nutritive value. We don’t recommend that you offer your baby or toddler pumpkin seeds however. Pumpkins are wonderfully low in fat, low in calories but high in fiber.

The Nutritional Goodness of Pumpkin


PUMPKIN: (one cup – cooked)

VITAMINS:
Vitamin A – 12230 IU
Vitamin C – 11.5 mg
Vitamin K – 2.0
Folate (important during pregnancy) – 22 mcg
Niacin – 1.01 mg
MINERALS:
Potassium – 364 mg
Phosphorus – 74 mg
Magnesium – 22 mg
Calcium – 37 mg
Sodium – 2 mg
Iron – 1.40 mg
Also contains trace amounts of zinc, manganese and copper.

When can my Baby eat Baby Food Recipes with Pumpkin?

Babies may begin to eat Pumpkins from 6 months old. You may feed your baby plain pumpkin in pureed form or mixed into homemade cereals, yogurts, and even in meats such as chicken. Adding a dash of cinnamon to pumpkin gives baby a first exposure to the wonder of spices.

You may also bake pumpkin as you would a butternut or acorn squash and serve the baked pumpkin in small dices as Baby Finger Foods. Rub a wee bit of butter and a bit of cinnamon on the inside of the pumpkin prior to baking for a tasty nutritious treat.


Choosing a Pumpkin to cook for Homemade Baby Food Recipes


purchaseorganic According to the EWG, pumpkins are not one of the “dirty dozen” foods that are most highly contaminated with pesticides – purchasing organic is a personal choice.

If you will be using Pumpkins in food dishes, look for smaller, immature pumpkins – sometimes these “cooking pumpkins” are labeled as “sugar pumpkins” or “pie pumpkins”. The smaller, sugar/pie pumpkins provide the most flavorful additions to any baked dish or baked good and are great as a soup. These smaller pumpkins are more tender and less stringy than the larger variety. Sugar pumpkins also have firm, sweet flesh compared to their big counterparts.  Try to find a pumpkin anywhere between five to eight pounds.

You may use canned pumpkin for baby food.  Ensure that you purchase canned pure pumpkin and NOT “Pumpkin Pie” mix.  The Pumpkin Pie mix contains sugars, starches and other additives. We do not recommend using canned foods for all of baby’s homemade food. Please visit our Using Canned Foods for Making Homemade Baby Foods.


Is it Safe to Feed my Baby Canned Pumpkin
How do I cook a Pumpkin?


Pumpkins may be poached, boiled, steamed or baked. Please be aware that Pumpkins tend to loose their nutritive value with prolonged cooking. Baking pumpkins for homemade baby food will ensure the most nutrients are retained for your baby. A Pumpkin must be cooked immediately after you have cut it open or you will find a brownish-blackish mold begin to immediately set into the flesh.

Once cooked, Pumpkin should be used and/or chilled immediately. If you will not be using the cooked pumpkin immediately, store it either pureed or in the cooked chunks, in the freezer. it does freeze well. The cooked pumpkin will turn a brownish orange so don’t be alarmed when you peak into the bowl and find that color.

Baking pumpkins, like many other fruits/squashes may be the best choice of cooking for optimal flavor and nutrient retention.


lightbulb When scooping out the “meat” of many winter squash types, you may encounter some very hard “strings”. These strings are actually the veins of the shell.

Look at the acorn squash or sugar pumpkin and notice it’s ridges. Between these ridges are the “veins” or strings that you may find once you have cut and then baked the squash or pumpkin. Check out the Is your pumpkin or winter squash puree plagued with hard strings? Blog post to see what I mean.

To avoid getting these hard little strings in your puree, scoop the insides out gently and not too closely to the shell. If you have baked your squash or pumpkin enough, these strings or veins will easily fall away from the shell as the meat is separated from it.


Basic Pumpkin Baby Food Recipes:


Pumpkin Puree Baby Food Recipe (6-8 months)

Ingredients:

1 sugar pumpkin
water
cinnamon, nutmeg (optional – sprinkle into the cooking water or when you puree/mash)
Pumpkin is best when baked though you may peel, cube and steam it. Bake a pumpkin exactly as you would bake a winter (Acorn, Butternut etc.) squash. Pumpkin is after all a squash.

Directions:

Step 1: Halve the pumpkin, de-seed

Step 2: Place halves face down in a baking pan with approx 1-2 inches of water

Step 3: Bake between 375-425 F for approximately 40 minutes to 1 hour

Skin should be “puckery” and/or wrinkled and pumpkin should feel soft when pressed

Step 4: Scrape out the pumpkin “meat” and then mash or puree as needed for your baby.

Apple Pumpkin Puree Baby Food Recipe (6-8 months)


Ingredients:

1 sugar pumpkin
3 Apples, peeled & cored (use Macintosh, Gala, Braeburn or Granny Smith)
water
cinnamon, nutmeg (optional – sprinkle into the cooking water or when you puree/mash)
Directions:

Step 1: Halve the pumpkin, peel and de-seed it then cut into cubes

Step 2: Slice the apples

Step 4: Bring water to a boil and then steam gently until soft and cooked. Be sure to check on the water level!Step 3: Add 3 inches of water to a pot and then insert a steamer basket – add the pumpkin cubes and apples

Let cool a bit then puree or mash as needed for your baby.


go2 Pumpkin is very watery so baking is the best method – you may peel, de-seed and steam chunks of you prefer.

Apple, Pumpkin & Oatmeal Breakfast Baby Food Recipe (6-8 months)


Ingredients:

1/2 cup applesauce
1/2 cup pumpkin puree
1 1/2 cup (cooked) oatmeal
Dash of cinnamon, nutmeg and/or ginger
Directions:

Step 1: Mix spices, applesauce, pumpkin puree and oatmeal together

Step 2: Stir thoroughly or blend if needed

Back to Top

Pumpkin Baby Food Recipes – Yummy Bananas & Pumpkin (6-8 months)


Ingredients:

1/2 cup pumpkin puree
2 small bananas
Directions:

Step 1: Mash 2 small bananas and add the pumpkin puree

Step 2: Mix thoroughly, blend if needed for your baby’s texture preferences. Makes a yummy addition to baby’s cereal or yogurt.


Baby’s Pumpkin & Pears (6-8 months)

Ingredients:

½ cup pumpkin puree (fresh or canned)
1 pear, peeled & cored & diced
Directions:

Step 1: Mash the pear and then mix in the pumpkin – puree if needed.


Pumpkin, Banana & Peaches (6-8 months)


Ingredients:

½ cup pumpkin puree (fresh or canned)
1 pear – peeled and cored and diced
1 peach – peeled, pitted and diced
Directions:

Step 1: Combine all food (steam pear and peach together if need be) and mash or puree if needed.

Back to Top


Savory Pumpkin Puree – A Tasty Pumpkin Baby Food Recipe (8-10 months)


Ingredients:

2 tablespoons extra-virgin olive oil
1/4 cup diced onion
1 to 2 cups pumpkin peeled and cut into 1/2-inch cubes (butternut squash may also be used.)
2 cups vegetable stock
pepper, rosemary, basil
pinch of turbinado sugar if desired
Directions:

Step 1: Heat the oil in a medium saucepot then add the onion and squash cubes. Saute until the onions are soft and translucent then add the vegetable stock.

Step 2: Bring the mixture to a slow simmer and simmer until the squash is tender enough to puree. Season to taste with pepper, rosemary and basil

Step 3: You may make this a sweet puree by using nutmeg, ginger and cinnamon as the spices instead of the savory spices and herbs.

Step 4: Toss this mixture with cooked brown rice, couscous, lentils or even quinoa for a hearty meal.


Baked Pumpkin Slices (8-10 months)


Directions:

Step 1: Halve a sugar pumpkin then cut into slices as you would a melon

Step 2: Pat slices with a wee bit of butter (or olive oil if you prefer) then place slices on a greased (olive oil) baking sheet and sprinkle lightly with water

Step 3: Drizzle with pure maple syrup or sprinkle slices with brown sugar (if desired) and then sprinkle cinnamon, nutmeg and a pinch of ginger.

I like to mix these spices together first for an even mix so that no one spice overpowers the other.


Pumpkin Risotto (8-10 months)


Ingredients:

1/2 cup extra-virgin olive oil
1 cup finely chopped onion
1 tablespoon chopped garlic
2 cups arborio rice
1 cup apple juice)
About 6 cups of hot chicken stock or vegetable stock
1 sugar pumpkin, one half baked and then pureed; the other half, peeled, cut into small dice, and sauteed in a little oil and butter until tender
1/2 cup grated Parmesan
4 tablespoons unsalted butter, cut into small pieces

Directions:

Step 1: In a medium-size skillet, heat the olive oil over medium-high heat. Add the onion and garlic and saute, until translucent and soft. Add the arborio rice and stir so that the rice is coated in the oil. Cook until translucent, stirring all the while.

Step 2: Add the apple juice and continue stirring and cooking until the juice has been absorbed. Slowly pour in enough chicken stock to cover the rice completely, about 3 cups, and continue to cook, stirring often, until all the liquid is absorbed.

Step 3: Pour in 1 cup more of the remaining stock and stir and cook until it has been absorbed. Repeat with last cup of stock. Add the remaining cup and cook until the rice is soft but but not mushy. Most of the stock will be absorbed at this point.

Step 4: Stir in the pumpkin puree and the diced pumpkin and reduce heat so that risotto and pumpkin mix in and infuse. Do not simmer – stir in the Parmesan and butter then serve.

I think I found this from the food network – it’s printed on now tattered paper and “network” is in the upper left-corner. It’s tattered because of over-use but my notes/tweaks are still legible – I have it down without the need to read.


Creamy Pumpkin Soup (8-10 months)


Ingredients:

16 ounces Pumpkin (canned or fresh pureed)
13.75 ounces Chicken Broth or Homemade Stock
1 Large Onion
2 Carrots (Wheels or Diced)
2 cups half and half or evaporated milk (sub. with yogurt if desired)
1/4 cup Sour Cream (optional)
1/8 teaspoon Pepper
1 teaspoon Cinnamon
Dash of Nutmeg
1/2 teaspoon Baking Soda
1/3 teaspoon( or less) Salt
Directions:

Step 1: In a large pot add, chicken broth, onions, carrot, baking soda, salt and pepper.

Step 2: Simmer uncovered for ten to fifteen minutes until carrots are soft.

Optional: Put vegetable and broth into a food processor or blender and blend until smooth. Return to pot.

Step 3: Add pumpkin and half and half or yogurt. Simmer uncovered for 10 minutes.

Step 4: Pour into soup crocks or soup bowls. Top with sour cream (optional)

Back to Top

Autumn Smoothie (8-10 months)


Ingredients:

1/2 cup plain, vanilla or banana yogurt
1/2 cup milk
1/4 cup canned pumpkin
1/4 cup unsweetened applesauce
1/2 teaspoon cinnamon
1/4 teaspoon nutmeg
dash of ginger
1 frozen banana
Directions:

Step 1: Combine everything in a blender. Blend until smooth. Serve immediately.

Serves one grown-up and one baby.

The Autumn Spoon (8 months+)  – A new twist on the Autumn Smoothie

1/2 cup plain, yogurt
1/4 cup canned pumpkin
1/4 cup unsweetened applesauce
1/2 teaspoon cinnamon
1/4 teaspoon nutmeg
dash of ginger
1 banana
Directions:

Step 1: Combine all ingredients in a blender or food processor. Blend or process until a thick consistency is created. Add some wheat germ for even more cling.

Banana Pumpkin Smoothie

Ingredients:

1-cup milk or plain yogurt
2 tablespoons canned pumpkin
(or homemade puree pumpkin)
1 banana
dash of cinnamon (8+months old)
Directions:

Step 1: Blend in blender until smooth and foamy.

Serve immediately.

Foods Good to Mix With Pumpkin:

Apples
Bananas
Blueberries
Peaches
Carrots
Butternut or Acorn Squash
Sweet Potato
Brown Rice
Lentils
Chicken
Yogurt

Source by: http://wholesomebabyfood.momtastic.com/pumpkin-babyfood-recipes.htm

Saturday, October 17, 2015


Peach panna cotta for baby

PREPARATION TIME 10 mn
COOK TIME 30 mn
12 to 18 months

Discover how to make this delicious peach panna cotta dessert for your baby!

                                                                               The recipe

Therecipe
Ingredients

2 ripe peaches (approx. 300g)

150ml milk


2 tablespoons cream 
1 teaspoon agar agar or honey


1 teaspoon orange blossom water


1 egg

Preparation Time: 10 minutes – Cooking Time: 30 minutes
Wash and cut the peaches into small pieces and start a 10-minute steam cooking cycle.
Blend the peaches in the mixing bowl. Leave the coulis to cool and set aside at room temperature.
Mix all the other ingredients together and pour the mixture into ramekins. Next, cover the ramekins with cling film and steam for 20 minutes in your Nutribaby.
Serve at room temperature with the peach coulis – it’s yummy!

Thursday, October 15, 2015

Crackers carrots


One of the first foods we gave our son, carrots have become a favorite in our house. They couldn’t be easier to prepare either!

Simply peel and slice the amount of carrots you’d like to use. Place in a steaming basket over boiling water and steam for 20-25 minutes or until tender. Adding a little bit of water (do not use your cooking water), purée the carrots in a machine such as a Blentec, food processor or Baby Bullet.

Allow the purée to cool enough to feed your baby, place in the fridge to be used within two days or place in ice cube trays to freeze for 4 hours. If freezing, remove the frozen purée from the trays and place in a freezer bag and mark to be used within 3 months.

It’s as easy as that! Once baby gets older, you can start adding the carrot purée with other vegetables and even add it to over cooked brown rice for a chunky meal!


source by:http://chocolateandcarrots.com/crackersandcarrots/2013/03/homemade-baby-food-carrots

Tuesday, October 13, 2015

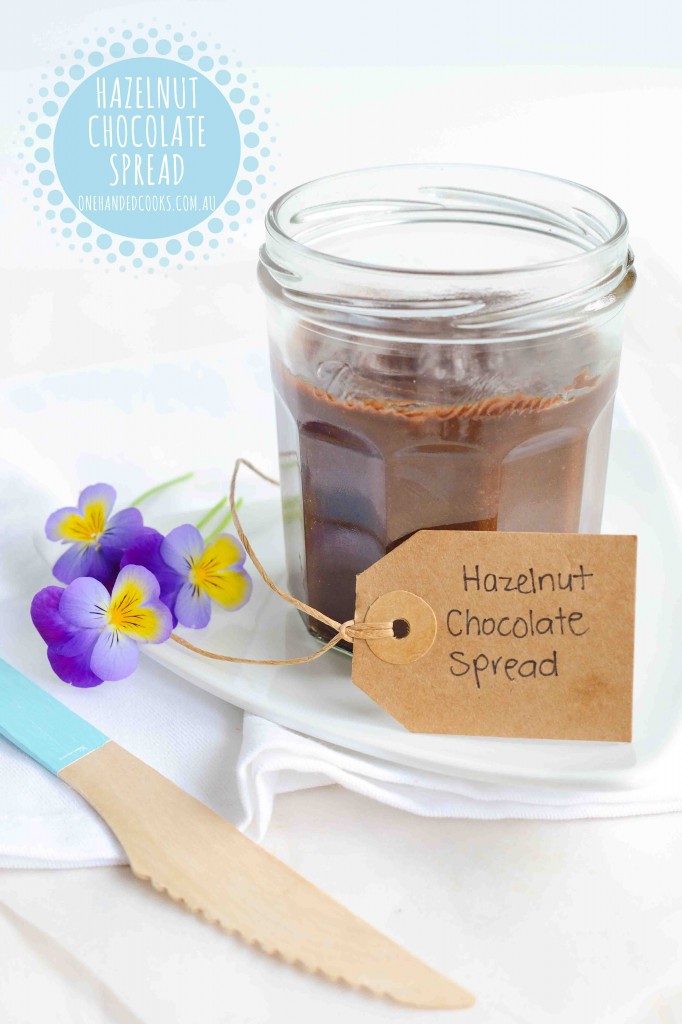
Hazelnut Chocolate Spread For Kids

2015-10-02
Course: Breakfast, Lunch, Snack


Hazelnut chocolate spread

Chocolate hazelnut spread is a huge favourite of mine. I love it on warm toast the best, but my kids love it on fruit slices for afternoon tea. Making my own takes no time at all and it lasts in the fridge for a few weeks. Plus I know exactly what goes in it so can enjoy it more often. Play with the oil quantity until you find the perfect consistency for you and try toasting the hazelnuts first, it adds so much flavour.


Storage: store in a sterilised glass jar in the fridge for 1 – 2 weeks.

Ingredients


1 cup *hazelnuts 
 

2 tbsp cocoa or cacao powder
¼ cup pure maple syrup
4 Medjool dates, pitted (optional)
1 tsp vanilla extract
2 tablespoons macadamia oil or coconut oil
*Lightly toast the hazelnuts for a stronger flavour.

Method


Step 1
Add hazelnuts to a high-powered blender, Thermomix or food processor. Blitz for a few minutes or until you have a sticky dough-like consistency
-
Step 2
Add the cocoa or cacao powder, maple syrup, dates if using, vanilla extract and macadamia or coconut oil. Process until you have a smooth chocolate spread. -

source by:http://onehandedcooks.com.au/recipe/hazelnut-chocolate-spread-kids/#DhBoUEtiifBHXXw3.97

Monday, October 12, 2015

12 October 2015 by Babymoov

Apple and grape compote

PREPARATION TIME 5 mn
COOK TIME 14 mn


The recipe


4 Golden Delicious apples
Preparation time: 5 minutes – Cooking time: 14  minutes


A delicious apple and grape compote, which could be turned
 into a refreshing drink if you wish; cook it in your Nutribaby
 of course!

Wash the apples. Peel them, remove the pips and cut into pieces. Put the apples into the bottom steaming basket of your Nutribaby to cook for 14 minutes.

Meanwhile, wash the grapes. Cut each grape in 2 and remove the pips with the tip of a knife. Then cook the grapes for the remaining 8 minutes.

Once cooking is over, pour the fruit into the mixing bowl together with the cooking juice and blend until you get a lump-free compote.

+ idea

Turn this compote into a delicious fruit juice by adding approx. 20-30 cl of water into the mixing bowl in addition to the ingredients and cooking juice. Blend well and then put everything through a sieve. Leave to cool in the refrigerator and serve baby this fruit juice at tea time!

source by:http://www.cookingbabyfood.com/recette/apple-and-grape-compote/